Showing posts with label Mods/Repairs/Decor. Show all posts

Sunday, January 17, 2016

A Gash and a Fix!

Now that she's all fixed up and back at home, I'm ready to post about the gash I put into the side of the Winnie at the end of our one and only fall trip a couple of months ago.

If you read my post about Wilderness Lake Campground, you may have wondered what I was hinting at when I mentioned the small circular loop driveway that their dump station is on.

Well...here's what happened: Kevin and Theo had gone off to drop T off for football so the dogs and I said we'd meet at home after I did a quick dump and rinsing of the tanks.  Dump and rinse was done and I was navigating the rest of the curve, being careful about the right side berm and trees...but not being mindful of the GIANT CONCRETE DRAIN PIPE THING on the left side.  I didn't take a photo when I was hung up on it, but once I got it backed off of the thing I snapped a couple:


So in a showdown between concrete and fiberglass, it turns out that the concrete WINS. EVERY. TIME.

A few more pics of the damage, once the hanging hunk fell off: 


We have Progressive coverage on the Winnie, and I have to say they were wonderful.  From the claim intake person being compassionate and saying kind things and not making me feel completely stupid, to the inspecting adjuster telling me that as bad as I think it looked it really wasn't that bad. Flo's team did not disappoint!


Progressive provided us a list of shops in our area as suggestions, but it was ultimately our choice where to go.  Since we had good results from Arlington RV (the dealership we bought her from) when we had them do some body work on the Winnie before we took delivery, we turned to them for the work.  We worked with Vince, and he was fantastic keeping us apprised of the progress.  The thing that took the longest was the backordered storage hatch door from Winnebago, but it finally arrived and she's good as new now!  Phew!


Sunday, September 27, 2015

Hard Wired Surge Protector

My parents' 2002 Bounder ended up being totaled since the front end work would have required expensive fabrication of parts because of the age.  Their new replacement Bounder is a 50 amp and came with a built in surge protector so we are the happy recipients of a hand-me-down Progressive hard-wired surge protector like this: EMS-LCHW30 which has a lot more features than the $100 plug-in one that we've been using.

Thank goodness Kevin has confined space certification, because he sure had to use it in the tiny space that our power cord is housed at.  OK, HE didn't go in, but his arm sure was in that confined space!


There it is back in there:  


Saturday, September 26, 2015

Chalkboard Table and Refrigerator

The Winnie is back home!  However, between scouts and football, we remain grounded on the weekends...so time for some mods and stuff!  (and sitting in it in the driveway trying to imagine we're in Vermont - yeah, it didn't really work)

So first up was something I've been noodling on for a little while: some facelifting with chalkboard paint!

I bought a pint of the Rustoleum brand at Michael's with my 50% coupon, a foam paint roller for cabinetry and a hunk of furniture grade birch plywood from Lowe's and off I went.


The fridge panels were harder to remove than anticipated because they were stuck in there with some double-sided tape-goo, but our carpenter's square helped me get it loose since i needed something stiff and strong and thin to slip behind it and break the seal.  Apparently, according to the Norcold website, they usually just slide in and out.  So I don't know if it was because ours was a rental or if the panels were rattling and annoying the previous owner.  Anyway, after some wrestling I got them free.  The backs looked good, so I just used the same panels for painting.  That way the original wood grain is still available on the other side if we, or anyone else in the future, want to use it again.

Lots of sanding and more sanding on both the fridge pieces and my new tabletop, a wipedown with tack cloth, then I was ready to paint.  I lost count of coats but it is at least 6 or 7.  I just went out and threw on another coat every couple of hours over the course of a couple of days.

Meanwhile I took the original table out (this new one is about half the weight!) and removed all of the hardware.  Another quick trip to Lowe's for new screws for the tabletop portion since the old one is 1" and the new one is 3/4" and I was good to go.  We very rarely use the dinette as a bed, but we decided to still use all of the hardware to allow it to swing down.  It will be 1/4" off rather than level in the center portion now, but I'm thinking it won't be too noticeable with the cushions not being terribly level anyway.

So here's the end results:


Here are some before pics: 


Sunday, April 5, 2015

Decor: How To Make Short Queen Sheets and Mattress Pad

Ever since cutting down our memory foam mattress, I've been considering some short queen sheets and mattress pad.  We had a short queen in our travel trailer and I used men's suspenders under the mattress to keep them nice and tight, but I'd prefer not to mess with that.  Anyway, I just couldn't cough up almost $80 on a set of sheets that I couldn't feel first, not to mention we have perfectly comfy sheets that have a whole lot of life left.  Same goes for the mattress pad, the one we have is very comfy and is supposed to help with overheating on memory foam, so I really didn't want to buy one that would be of lower quality just so it fits better.  

Enter my sewing machine and about 30 minutes of my time!  

This project is easy enough for anyone with basic sewing skills and a basic sewing machine.  I'm sure a serger would make it even easier, but I only have a regular machine and it was no problem at all.

So first I put the mattress pad on the bed inside out (yeah, it's kind of pilly on the underside).  Then I lined up the corners and pinned the excess.  I went about a foot away from the end so I'd stay away from the more complex corners and be able to do just a straight seam.


Then I did the same with the bottom/fitted sheet, clearly I'm not one of the tidy housekeeping types that irons her sheets: 


Then I just did a straight seam across the whole thing, including the sides.  After that I cut the excess off: on the sheet I used a pinking shears, but on the pad I used the pinking shears just on the thinner side panels and used a straight shears on the fluffy stuff.


Yes, I used black thread because that was what was in my machine, I'm lazy like that.  I knew it wouldn't be visible when done anyway.

In making the bed I put the seams at the top so they'll be under our pillows and not a bump at our feet to annoy us.  Actually, the mattress pad bump is not nearly as big as I thought it would be!


So just like that we have better fitting bedding!


Oh, and I decided to leave the top sheet the normal length since we can just tuck the extra in or fold it over at the top.

Sunday, February 1, 2015

Decor: New Cabover Curtains

Next step in our little interior facelift: new cabover curtains.  I was really excited to find out that I could buy the tape with the curtain sliders on it rather than take it off the existing curtains.  Once again, I'm so thankful for Winnebago's easily accessible documentation so I knew what to search online for.  Luckily Amazon carries it: Glide/Slide Tape

We have these thermal blackout curtains already behind the cab to block off the heat or cold and an quicker and easier overnight blockoff than the windshield cover.  So I measured and ended up buying the same thing and cutting them up to use for the bunk privacy curtains and side window curtains.

Sewing the glide tape was pretty easy using a zipper foot and a #16 needle in my regular old Kenmore sewing machine.  I went slow and had no problems.


Final product, I think they look great!  The curtain set comes with tiebacks, so I didn't even have to sew a pair, and I used the factory hems when I could, so it was a pretty simple  project:


Monday, January 5, 2015

Mod: New Upholstery

When we hit the Hershey RV show in the fall, really the only thing that I wished for was an updated interior so I decided that an upholstery facelift would go a long way.  Not that I hated the original fabric (which was wearing like iron) but I like some of the more subtle solid colors. I'd really like a synthetic "pleather" for easy cleaning, so I checked around and got a quote from a local upholstery place - $950 for the dinette and jacknife sofa...so off I went to the fabric store to see what I could do myself!  About $150 in fabric and notions and a few hours time and we're good!  Not quite professional and not my coveted pleather, but I think it turned out well and it held up nicely through a 2 week trip already.  I simply covered the original since it is in good shape and you never know if we or someone else will want it back down the road.

The jacknife sofa came off of the frame in two pieces, and was simply bolted on with four bolts per section:


The jackknife was all sewn by hand (I had the bruised fingers to prove it) and the dinette cushions were done by machine.  I had plenty of help from the fur brothers, then the human one thought it was funny so got into the game...oy!

Here are the notions I used - the twist pins were good for holding the fabric into place while I stitched, then I left a few of them in place in areas with larger gathers of fabric.

Old fabric: 

And the final product: 


I also covered the accent strip in the window toppers to match the new fabric. Now I just need to replace the cabover privacy curtain and the little side window curtains up there as well, since they are still in blue tones.


Monday, September 22, 2014

Mod: Ceramic Bowl Toilet

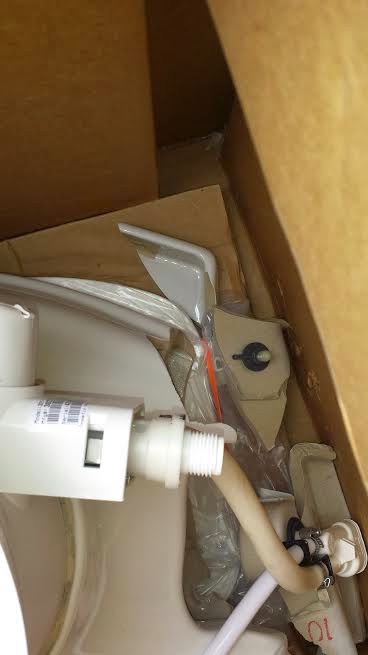
Yes!  A "real" potty :)  I just have never been nuts about the plastic toilets and our valve was sticking on the OEM one, so we took the opportunity to get a ceramic bowl.  The base is still plastic to save weight, but the bowl is ceramic and the seat is residential style.  Since we are on a riser, it is a short model - Dometic model 321  (302321781 ) with a sprayer.

Old potty:


First new potty as delivered: 

As Kevin said "how many pieces should your new toilet come in???"


And the second new potty, after installation:

Kevin had a tricky time with some of the plumbing, including making sure that the vacuum breaker valve was perfectly level and pressurized.  The first few flushes it spittled a little bit.  Other than that, installation was easy.  In that small space it is a one person job though!  No team effort, other than moral support from outside of the bathroom!

So far so good, we like it a lot :)

Sunday, August 31, 2014

Mod: Magnetic Storage Strip

When we remodeled our kitchen 4 years ago, I bought a few magnetic strips thinking that they are so cool and handy, but we just never could think of a good place or use for them.  So when shopping the basement work room earlier for something to make feet for the cooler mod, I came across them an decided they might be a handy way to store the s'mores forks in the back hatch!  I also added a couple of the storage tins I bought to go with them, in case we come up for a use for them.


Mod: 12v outlet for the Coleman thermoelectric cooler

...or our cheap way to add our most coveted portion of an outdoor kitchen.  So after an online thread about thermoelectric coolers for tenting or pop-up camping, I recalled that we had one sitting in our basement not seeing any use since we installed a fridge in our Aliner.  So the lightbulb went off and I thought why not add a 12v outlet to our big storage hatch in the back and use our cooler like a mini fridge accessible from outside?  The whole thing cost us all of $4 for the outlet, sweet!

It was wicket easy to tap into the 12v line to the light in the hatch:


Probably the most labor intensive part of this project was making little feet so the door will swing open fridge-style and clear the hatch frame.  I just cut some hunks of 2x4 then used both adhesive and some decking screws we had around, the screws aren't super long, thus the belt and suspenders of the adhesive:

Voila!  Our "new" mini fridge for beverages and condiments!:


And here's how I think it will ride when we are in transit to avoid toppling over: 

I'm thinking we won't use it when dry camping because of the draw on our batteries.  We do have a pair of 6v golf cart batteries, so we have quite a bit of juice...but I'll have to do the math on how long this would hold up, not too long before frying them I would think and it obviously isn't a necessity.


Mod: Bathroom Light Switch

Since I am not terribly tall, and Theo isn't yet either, I've been wishing for a switch for the light in the bathroom.  So I ordered up the switch and Kevin did the installation.  He was able to fish the wire through the ceiling, but we decided to use surface mounted wire molding for the wall portion.  It turned out great and works like a charm!


Saturday, August 16, 2014

Repair: New sealant and graphics

We noticed that some of our sealants were starting to crack and peel away and decided to take the sissy way out and hire Elite Transformations in Portland, CT to remove the old and reseal the whole thing.  And while they were at it, we asked them to fix up the peeling decals on the front and back.  The picking out of the old sealant is a ton of work, and I know it would take us weeks to complete, not to mention make us crabby...so we're happy that Chris and his crew was able to help and did a great job!

And the new graphics look awesome!  We really like the classic Flying W lettering.


In hindsight we should have negotiated a re-seal job into the purchase from the dealer last year.  Lesson learned.  But then again, I wonder if they would have done as careful and complete a job as Chris at Elite Transformations.

Tuesday, July 8, 2014

Flat Tire! Good Sam to the rescue!

So we were moseying along on the backroads of Connecticut's "quiet corner" wondering why the GPS took us this way, when all of a sudden, BAM!  This boulder along the road at a curve reached out and slashed the sidewall of the rear passenger side tire!  I know, right???

You can see the boulder in question right next to our caution triangle:

So a call to Good Sam Roadside, then an emptying of junk from the big cargo hatches so we could get to the mounted spare was in order.  Theo helped get the spare unbolted and ready for when the service truck came:

Here's a better view of the boulder...it really is awfully close to the roadway:

So when you sign up for roadside assistance you assume you'll need them on some dark and stormy night along the roaring interstate, not on a lovely afternoon on a rural road!  While we waited for the truck to be dispatched and arrive we had a nice lunch then I took the dogs for a walk.  We happened to be right in the middle of forest property belonging to Yale!  There are certainly worse places to have a flat!


The guy showed up in fairly short order and swapped us out like we were in the pits at Indy Motor Speedway!  Theo watched from up above:


We lost just 90 minutes total, not bad at all!  

Lesson 1: remember to take the corners a little wider
Lesson 2: a mounted spare is a huge time saver
Lesson 3: Good Sam is worth it